Showing posts with label review. Show all posts

Monday, December 23, 2013

Babyliss Miracurl Review and Tutorial

Hello dolls!!

So the semester is over, work is over, and Christmas break is here. I should be able to post a lot more during my break. I've just been going through a lot lately so I haven't really been in the mood to post. So here's a recap on everything makeup: I tried out the Naked 3 palette. It's pretty good. More on that in my review/tutorial post coming up this week. I never did try out that Sultra Curling Rod just yet, but I did get around to trying the Babyliss Miracurl, which I'll be talking about right now! I used it last night to curl my hair and wow. I never did get around to finishing the Perfect Palette Tag, but that's next on my list. I also bought a few products from Lush for the first time in my life. Unfortunately, I haven't been able to try out my bath bomb or bubble bar because my tub is pretty dirty. I'm going to wash it this week and then take a relaxing bath and I'll let you know all about it. I also got my mom a Christmas present there too, but I can't say what it is just yet in case she reads this. I'm still trying to figure out what to get my dad and brother. Any suggestions?


Finally, my Babyliss Miracurl has arrived!! Actually, it arrived last week after a looong looong wait (I bought it on Black Friday online but it was out of stock so I had to wait a while for them to receive it and then ship it out to me). I used this last week on my mom's hair when we first received it. Her hair wasn't freshly washed, and getting greasy, so it didn't curl well im some areas, namely, the back of her head, where it didn't curl at all. But it curled very nicely on the sides of her head. I had similar trouble with this, so I would recommend using this on freshly-washed hair ONLY. I was excited to try it out, so that same night I curled various sections of my dirty hair and got the same problems as my mother. My hair is very difficult to curl too. So unless your hair curls very easily, I really don't recommend using this on dirty hair.

My mom bought the Miracurl because she wanted to be able to curl her hair very easily and quickly, without the fuss of a regular curling iron or rod. I can say that it definitely does curl hair much quicker and it makes the job so much easier. It does give a different type of curl, in my opinion, but I still do enjoy it and I think it looks lovely.


I also want to note that I am not wearing any makeup. Not even 1%. So can we please not talk about the outbreak of pimples in my forehead/nose region?? And can we not talk about how bad I look?? God bless Photobooth for the above photo and not making me look like too much crap.

What's In The Box?


The box contains the Miracurl (obviously), a cleaning tool, and 3 booklets. The cleaning took is very tiny, and is meant to be put in the space between the roller and the side of the machine (on the side that faces your head). It is covered with felt, so that it gently cleans the roller without scratching or breaking it. The included booklets are the instruction manual, a quick-start guide, and a tips and techniques style lookbook.

Front
this is the side that faces your head
hair goes into the V shape, right on top of the roller

Back

Top

Bottom


How Does It Work?

Now, before I get into my in-depth review, I'm going to explain how this device works. When I first saw it, I thought it looked like some extra-terrestrial croquet mallet. But no, it's actually a device to easily and quickly curl hair. I'll first explain how the setting works, and then I'll explain how this actually curls your hair. So, the first setting, located on the left, is the curl direction setting. This decides which in direction your curls are going to turn. The 3 options are: R,L, and A. R is for right, so you choose this if you want curls going right, or if you are working on the right side of your head. L is for left, so you choose this for curls going left, or if you are working o the left side of your head. A is for alternating, so it alternates your curls left and right, so you have a more natural look. This is the setting that I chose for today's look. The next setting is the time setting. The 4 options are: 12, 10, 8, 0 seconds. You choose the time option for your hair type; I should have chosen 8 seconds for my fine hair, but I chose 10 seconds because my hair is difficult to curl (and even more difficult to keep that curl!). So if you have coarse, thick hair, you should choose 12 seconds. The last setting is the time setting, where again, you have 4 options. You have III, II, I, and on/off. The on/off switch is at the right-most setting. You turn on the device by selecting the level of heat that you want. The red light will blink until it is ready, where it will then be continuously lit. For my fine hair, I chose the "I" setting. The three different heat settings are: I is 375F, II is 410F, and III is 450F. So you choose which heat setting is appropriate for your hair. That's about it for the different functions, now I'll explain how this device magically curls your hair!

The Settings:
R,L,A (curl direction)
12,10,8,0 (time)
III, II, I, on/off (temperature)

So you've set your settings, it's all heated up and ready to go, but now what? How exactly does this device curl your hair? So first, you should section off your hair like you would normally do when you curl your hair. Take a strand of hair in one hand, and the device in the other. There are two different sides to the device. On the first side, you can see the roller in the middle, and it reads "this side up (toward head)". You need to make sure that this side is ALWAYS facing your head. The other side is closed and you do not see the roller. So take your strand of hair, and you want to place it into the "V", with the rest of the strand hanging out, and then clamp down. The "V" leads down into the roller. When you clamp down, the Miracurl sucks the hair in from the other side (the side where your ends are) and then it rolls it around the curler. It'll beep once when it's in, and then it will beep three consecutive times when it's ready to be released. Make sure you keep it clamped while it's curling your hair. And make sure you release it before you take your hair out, otherwise it will just straighten your hair. I also think there's a method to removing your hair from the device. I like to go as slow and gently as possible so that I don't damage the curl. So that's it! The Miracurl does all the work for you! The only thing you need to do is section off your hair, and feed strands into the Miracurl! As they say, hair goes in, curl comes out!

This side faces your head
Hair goes into the V, which gets sucked in to the roller

What if you put your hair in the wrong way or it gets tangled up inside? The device will beep quickly and stop when it senses something's wrong. Then you unclamp it and remove your hair. It doesn't pull or hurt.


Now I didn't think of including any pictures or video of me curling my hair at the time so I hope this explanation was good enough for you to get a mental picture of how the Babyliss Miracurl works.


My Review


I have to say that I quite enjoyed using the Miracurl. It made curling my hair fun, fast, and easy. It was soooo cool to watch my hair get sucked up by the Miracurl and then get a nice curl in 10 seconds! It was really easy to use. I didn't really have to read the instructions, it was pretty intuitive. I really liked that it had an alternating setting for the direction of the curl. It heated up quickly. It's also good that there is a "0" time option, so if you need a bit more time, you can leave it in for as long as you like. I used the settings that were optimal for my hair, but I found that in some areas it didn't curl well. I had a few strands that were partially straight and partially curly. I was using the Miracurl on day-old hair so that could be the culprit, so I won't blame the Miracurl just yet. My hair is difficult to curl, so that could also be the problem. But for the curls that I did get, it looked fantastic. I used the alternating curls setting, and it looks very natural. As a whole, it curled very well on the lowest heat setting and middle time setting. It took so much less time than my usual curling method, where I curl my hair using a straightener (flat iron). I'm going to give this a 10/10 for now, and I'll definitely have to figure out why those random few strands don't curl. I'm pretty sure it was because they might have been more greasy, because when I first used the Miracurl when I first got it on me and my mom's third day hair, the greasier strands just would not curl. I definitely think you should go pick one up if you're interested, and maybe even as a gift to mom to make her morning routine much easier and faster!


My Tutorial


I started off using second day hair, but for best results, I suggest using freshly-washed hair. I divided my hair into 3 sections to start with. For the first section, take a rat-tooth comb and go above your ear and around to your other ear. This will be the bottom part. Then divide the hair you have left into two parts, I divided mine in the middle. I curl the bottom first and then I take out small horizontal sections from the left section starting at the bottom and working my way up to the top. And then I do the same thing on the right side. I don't have much hair and my hair is very fine, so you may need more, smaller sections depending on your hair type. Each strand you put in the Miracurl might need to be bigger/smaller depending on your hair type and how curly you want it to be. I also hair sprayed each strand after I curled it using Big Sexy Hair's Spray and Play Hairspray. I love all their products, I may have to do a review on their line one day.


I explained above how to curl your hair, so I won't go over it again in fear of this being too repetitive. I will tell you the settings I used for my thin, fine hair. I did alternating curls to get a more natural look. I also curled my hair for 10 seconds because my hair is harder to curl. I used the lowest heat setting, I, because of my hair type. So I used: A, 10, I. Obviously, if you have thick coarse hair you would use A, 12, III, and if you have normal hair you'd use A, 10, II.


So I hope you enjoyed this review and tutorial in one! Again, I apologize for not having any pictures of me using the Miracurl. It is very easy to figure out how to use it, so I don't think any of you would have any trouble with it. This may be my new go-to hair curling device! I love using a straightener, but it takes sooo long to do, whereas with the Miracurl, it literally takes seconds. Have any of you tried the Babyliss Miracurl? Do you think it's worth it?

I've got a bunch of posts coming up, like the Perfect Palette Tag, Urban Decay's Naked 3 review and tutorial, my first Lush experience, etc. So don't miss out by subscribing!!

Steph xo.

Tuesday, November 26, 2013

My First Drugstore Haul!

Hello hello beauties!!

Now I know this is probably going to sound super pretentious but I just went on my first drugstore makeup haul. As a teenager, I always saw my mom buying MAC products so naturally I followed suit. With her love of high-end makeup products, I naturally gravitated towards that as well. That gave me the idea that drugstore makeup was inferior makeup, but that's not completely true. So please don't judge me. As a kid, I played with my fair share of crappy children's makeup so when I was finally in my teens, I wanted grown-up makeup, and to me, grown-up makeup was MAC and other medium to high end makeup brands. Since I don't have any drugstore makeup at all, I don't really know what's good so it's kind of trial and error for me right now. I've been doing a lot of googling and watching YouTube trying to figure out what to buy and what to avoid. So please let me know what products to try out and which to avoid!! Our first Target store finally opened and I went nuts. I hear so much about NYX but there was no way to buy their products until our first Target stores just opened. And unfortunately, a lot of the good stuff was sold out but I still got my hands on a few things.

The bulk of this haul is NYX products. I just kinda went mental since this just became available in Canada and bought a ton of stuff. One thing that I wanted to get that they were out of is their Jumbo Eyeshadow Pencil Stick (or whatever it's called) in Milk. I keep hearing about it being a perfect eyeshadow base, especially for bright colors. I heard that their actual Eyeshadow Base is a good product too. I'm trying to figure out which is the best out of the two so I don't end up hauling both. I also want to know what your favorite NYX products are! I heard that their blushes are good and can also be used as a bronzer to contour, but unfortunately my Target doesn't sell their blushes. I'm sad. They don't have very much actually. They have a small range of single eyeshadows, maybe a little over two dozen eyeliners (about 3 different types), 5 lip liners, 6 lip pencils, 6 shadow sticks, maybe 10 lip glosses, a good dozen round lipsticks, you get the idea. There's really not much there, which was very disappointing. They also had some palettes in a different section so by the time I noticed it, there was almost nothing left.

Don't forget to cast your vote in my poll! You can find the poll widget on the sidebar to your right, just below the Facebook widget.

So let's get into the haul! I'll describe products that I've tried so far. Scroll all the way down for a bonus LOTD.


NYX:

4 Retractable Eyeliners: 01-White, 02-Black, 03-Aqua Green, 11-Purple

01-White

02-Black

03-Aqua Green

11-Purple

I've tried a couple of these liners and wow I'm impressed. I wore the Aqua Green liner for two days in a row now to get a feel for it. I wore just that on my upper lid and I used the white liner in my bottom waterline. They both stayed on all day. No fading or smudging whatsoever. Pretty impressive for a 6$CAD eyeliner. I'm definitely going to be picking up more shades!!

2 Liquid Crystal Liners: 102-Crystal Onyx, 106-Crystal Hip


102-Crystal Onyx

106-Crystal Hip

I wore the Crystal Hip liner on top of my Aqua Green Eyeliner today. I picked a white sparkle liner specifically for putting sparkles on top of colorful eyeshadows or eyeliners. The liner itself doesn't have a color, so it looks like you're applying sparkles. It looks beautiful on top of the green liner I'm wearing. I can't wait to use this on other eyeshadows and sparkle up a look. I swatched the black one and it's a black liquid liner with silver sparkles. I can't wait to use it the next time I do a smokey eye. I'm happy I got these and for 7 or 8$CAD, wow.

Round Lipstick in 509-Narcissus


509-Narcissus

I wanted to love this lipstick. The only good thing about it was the color. It went on streaky and had a weird texture. It didn't have any lasting power and it smudges off right away. I'm kind of disappointed in it. It's definitely not the best lipstick out there. I wouldn't purchase their lipsticks again.

Mega Shine Lip Gloss in 129-Beige


129-Beige

I really liked their lipgloss. It isn't sticky and it goes on nicely. It has a decent smell. Their naming scheme is a little weird though, I gotta say. The lipgloss is called Beige, but it's pink. It's a medium pink and looks like it would flatter most people. I wish my store had more shades, they only have around 8-12 and most of them don't flatter me at all or are too dark. I like the lip gloss, I just wish they had a bigger range at my Target.

Jumbo Lip Pencil in 716-Pink Brown, 721-Soft Fuschia, 724-Chaos


When I bought Chaos, for some reason I thought it was a pinky-red but it's straight-up red. It goes on really well and is very pigmented. The color was a little too bright for me but the quality was there. I only wish my store had a better range of colors. My mom just picked up the other two for me today. What is up with NYX's naming scheme? Pink Brown is a very light pink and Soft Fuschia is like a nude/brown color. I really don't understand haha. I tried Pink Brown and it's a light pink with a bit of a golden shimmer in it. I would wear it with a pinky peach blush or a watermelon pink blush. I haven't tried Soft Fuschia yet but swatched it and it is clearly a nude color.

Xtreme Lip Cream in 02-Candy Land


02-Candy Land

I haven't tried this yet but I have to say that my Target's range of colors and products is ridiculously low. This color would better suit my mom than me. I swatched it and it does seem to go on creamy and it seems to be decently pigmented.

Matte Lipstick in 06-Summer Breeze


06-Summer Breeze

My mom also just picked this one up today so I haven't gotten a chance to try it yet. I swatched it on my hand and it is a medium pink color (fuschia?).

Be Free Palette


I just picked this baby up yesterday so I haven't had time to play with it yet. I have read that NYX's palettes tend to be of lower quality than their regular range of products. I've also read that some palettes can be hit or miss. When I was deciding which palette to buy, I realized that I like half of this and half of the Be Fierce one. I liked Be Free's eyeshadows but liked Be Fierce's blushes and lipglosses. I went for Be Free because you get more eyeshadows than the rest and the blushes and lipglosses weren't terrible colors. I just just stuck my fingers in some eyeshadows. They don't seem to be very pigmented but I think they would be alright with primer. I'm going to have to test them to see. I'm guessing that it'll probably be along the lines of Sephora Collection's quality in their palettes, which isn't bad if you use a primer.


Physician's Formula

Mineral Glow Pearls Powder Palette in Translucent Pearl


I saw Kandee Johnson talk about this in one of her YouTube videos. She said it was a good quality luminizer and showed a swatch of it and I immediately said to myself "I have to try this". I haven't been completely happy with any of my powder luminizers so I was down for anything. And you know what? I think this might be my favorite luminizer. It gives a nice glow to the skin without being too shimmery or sparkly. I wouldn't use it as a full face powder like it's meant to be used as. It does make an excellent luminizer though. I feel like it gives a nice healthy glow and accents your cheekbones without being too overbearing or obvious. For 20$CAD, this is a great find compared to my higher end products that I don't like as much. And I got this on sale for 15$CAD and was wowed when I saw it at Target today on sale for 13$CAD.


Burt's Bees

Strawberry Lip Shimmer


I didn't realize this when I bought this because it's my first Burt's Bees product, but it has a peppermint smell. And I hate mint. So the smell kinda turns me off. This is very much a lip balm and not a lip gloss. It gives a slight pink shimmer to the lips. I thought it was okay. It didn't wow me nor was it anything special. That and because of the smell, I probably won't be buying another one of these.

Ultra Conditioning Lip Balm


I haven't tried this out yet, I bought it for my makeup kit for jobs for moisturizing my model's lips before lipstick application.


Vaseline

Lip Therapy Mini Balm


I also bought this for my makeup kit. I tried it and I'm pretty sure it's just regular vaseline. I bought the mini one so it's small enough to fit nicely into my kit. Cuz let's face it, when I'm carrying half my makeup collection to a job, I don't wanna be carrying a huge tub of vaseline with me.


Essie

Lapiz of Luxury


I got this color to go with Muchi Muchi and to maybe do some water marbling. I was thinking that Lapiz of Luxury along with Muchi Muchi and Mint Candy Apple would make a good mix of colors. I haven't used Essie yet to water marble so I'm wondering, it Essie a good brand for water marbling? And which shades have you used to water marble with? Show some pics!


Thanks for reading and I hope you enjoyed my very first drugstore haul as much as I did! I am honestly very impressed with some of the products I bought. I think I might even have new favorites here!! And the fact that they were super cheap compared to high-end brands and still good quality blew me away. I'm going to try out more products and write about them. I also want to know, what are you favorite drug store brands? What are your favorite products? Which products are hits and which are misses? Do let me know what's worth trying! I'm new to the land of drug store makeup so point me in the right direction please. There are a few things I want to try, like Maybelline's Color Tattoo eyeshadows. So until the next haul!

I was also wondering, should I do a makeup look using drugstore products? Should I try to incorporate one or two drugstore products into each look?


Look Of The Day!!


And here's a bonus, my makeup look of the day! Here's me trying to incorporate some of my drugstore stuff into my look! It's very simple, hope you like it. And yes I know my mascara smudged a bit under my eyes. I've also been loving MAC Longwear Concealer! I think it's even better than their Select Cover-Up Concealer which I had been using since I was a young teenager! Here's what I'm wearing today:

Eyes
Too Faced Shadow Insurance
NYX Retractable Eyeliner in 03-Aqua Green
NYX Liquid Crystal Liner in 106-Crystal Hip
Benefit Bad Gal Lash Mascara
Benefit High Brow Pencil
Benefit Instant Brow Pencil in Medium

Face
MAC Pro Longwear Concealer in NW20
Too Faced Tinted Beauty Balm in Snow Glow
Laura Mercier Loose Setting Powder in Translucent
Physician's Formula Mineral Glow Pearls Powder Palette in Translucent Pearl
Chanel Les Joues Contraste Blush in 64-Pink Explosion
Too Faced Bronzed and Poreless

Lips
EOS Strawberry Lip Balm


If you want a detailed tutorial on this look, comment below! And let me know if you want to see more looks using drug store products.

If you want to see how you can get this killer pastel mani, see my Pastel Manicure using Essie post.

Steph xo.

Sunday, November 24, 2013

Pastel Manicure using Essie (and a little review of some Essie products)

Hello ladies!

I am long overdue for a nail post. I've discovered that Essie is, so far, my favorite nail brand. I'm not that big on nails, so I haven't tried that many brands and I'm sure you all have your own opinion as to which nail polish brand is the best, but I do love my Essie polishes. I'm going to tell you a little bit about each product I use to prep my nails and why I like it so much. I know I already spoke a bit about that but I don't feel as if I really articulated my thoughts very well so here we go again. Now that I've used them quite a few times I feel that I can give a proper review. I really do prefer Essie to other brands that I've tried, though I am open to suggestion.

I'm sorry if some pics are a bit out of focus, my camera's battery was dying so I was rushing to get all my pictures done and uploaded before it died.

Want to know what my next post is going to be about? Read down til the bottom to find out!


Prep Time


As I've said before, I prep my nails by filing them with Sephora's crystal nail file. Then I use their 4 step nail buffer. Then I apply Essie's Apricot Cuticle Oil to my cuticles and nails. I let them soak for a few minutes and then I take my cuticle pusher and push them down. Sometimes I trim my cuticles, but only if it's really bad. I also make sure to clean any gunk from underneath my nails. I find that their cuticle oil is pretty hydrating and does a good job prepping them. I'm also going to mention that after I remove nail polish from my last manicure, I like to put a ton of hand and nail cream on my nails and just let them soak up and re-hydrate. I use the Body Shop's Almond Hand and Nail Cream. I really like it as both a hand and nail cream. It does a great job keeping my hands and nails moisturized. This is the first cream that actually works on my nails. So now that I've prepped my nails and cuticles, it's Essie time.


Treatment Time


I use their Millionails treatment, which is a strengthener treatment. I find it's the best one I've tried so far. When I first started doing my nails often (and I mean once a week or every 2 weeks as opposed to never), my nails were always incredibly frail after I took the polish off and would break and chip very easily. But since I've started using Millionails, my recently depolished nails are as strong as they were before I started my nail polish binge. And this also helps them to not be so darn yellow! If you do your nails often, you know that the lack of oxygen to your nails is what yellows them. I don't know what this stuff does but my nails barely get yellow anymore. It's amazing.


Base Coat Time


I also use their First Base strengthening base coat. I do like it. I can't tell if it has been strengthening my nails, but only because I started using Millionails the same time as I started using this. But I like to think that combined, they help my nails a lot. It also does a good job of prepping the nail for color. It looks like a very opaque light pink in the bottle, but it goes on clear.


Color Time


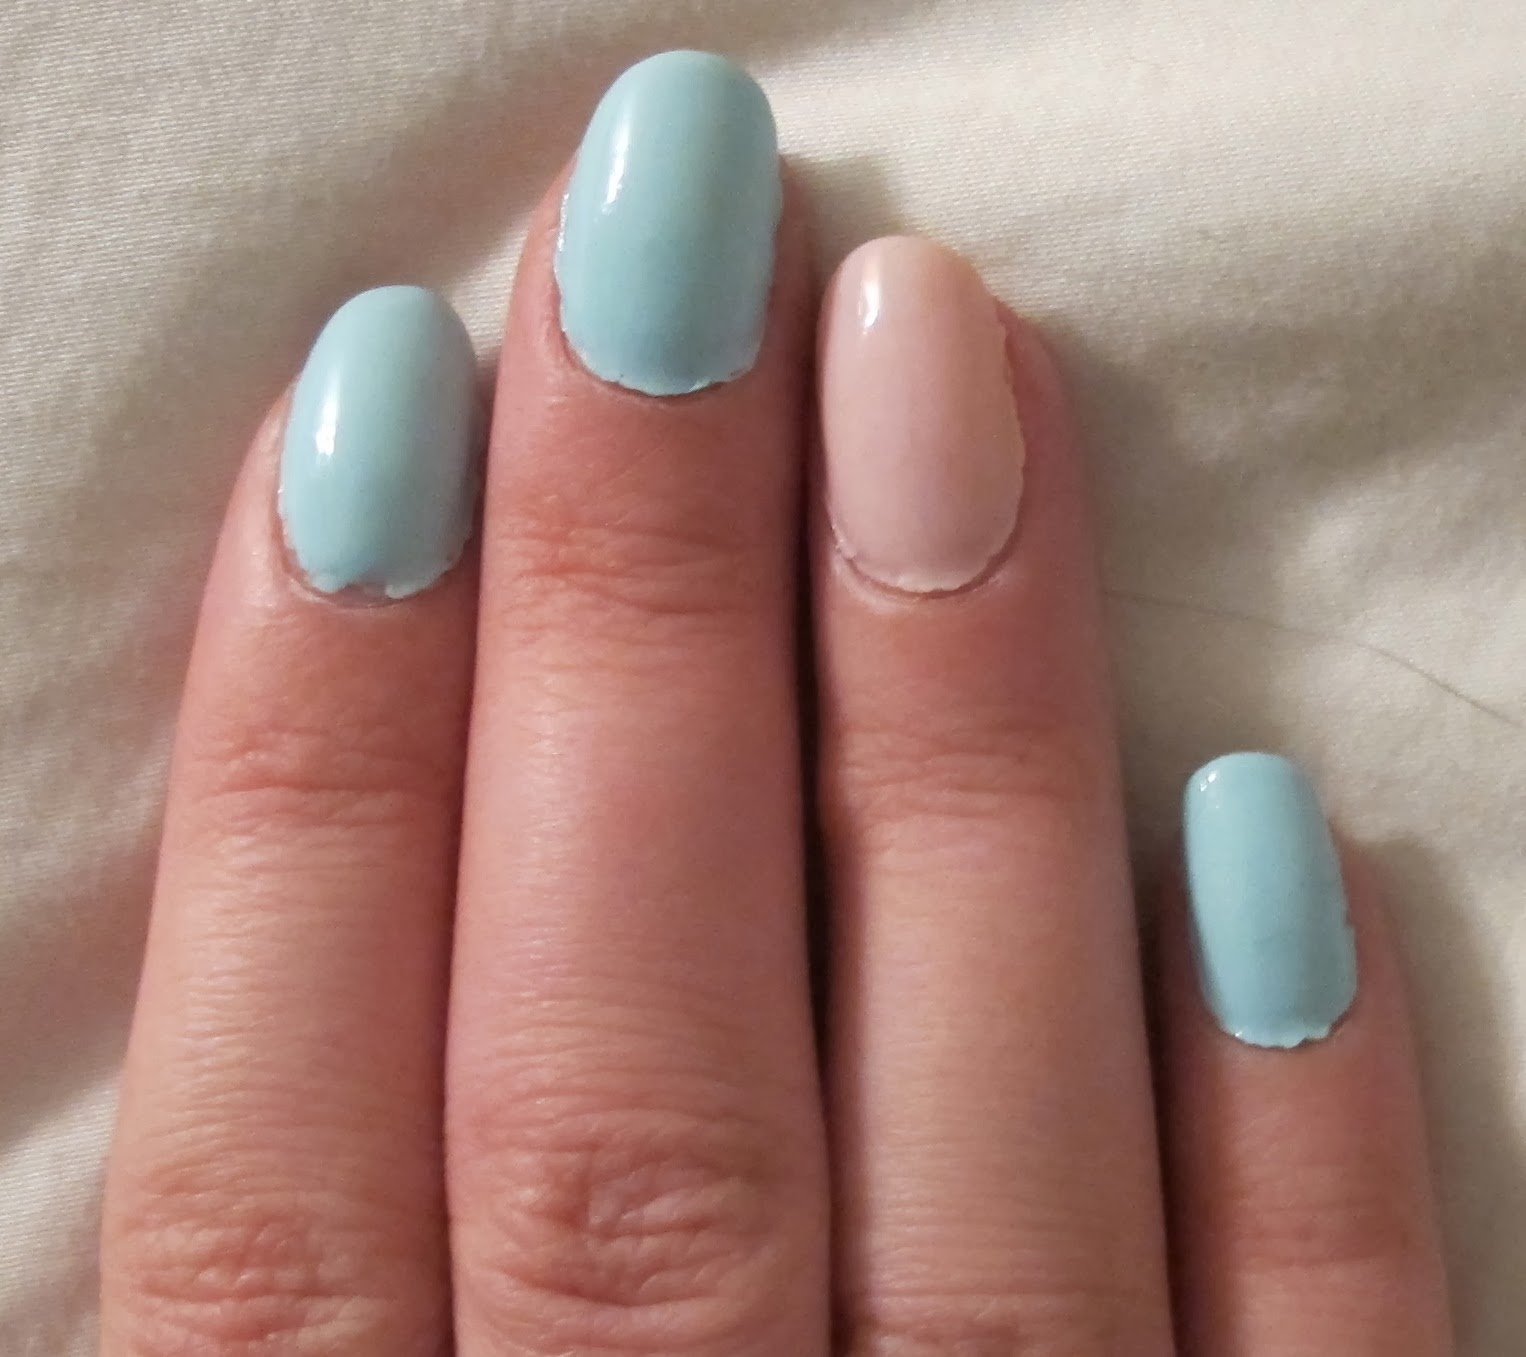
Now for the colors I used in today's manicure. I did all my nails (except ring finger) one color and my ring finger another. Cuz I'm cool like that. The main color is Essie's Mint Candy Apple. It's a very light pastel minty color. I find it's almost like a light turquoise color in the sense that it isn't strictly green, but has some blue in it as well. The polish goes on quite nice and it takes me 2 coats to get full opacity. There's something about this shade that I just love. The only thing I don't like is the small brush. It usually takes a few strokes before I get the whole nail, and sometimes it dries fast, causing streaking. The last time I used this, it lasted for over a week without a single chip. I was pretty darn impressed. The color on my ring fingers is Essie's Muchi Muchi. It's a very light pastel pink. It takes 2-3 coats for full opacity depending on how thick they are. I used two for today's. It goes on pretty sheer looking so you definitely have to put on a few coats depending on how you want it to look. It does get a little streaky so I suggest thinner coats and minimum 3 coats for full opacity. It is a very nice color once you've reached full opacity. You might be able to use this as a french manicure color if you use one coat. Even now, if I look closely, I can tell where my nail tips are. Out of the two colors, Mint Candy Apple is definitely my favorite, both color- and quality-wise.


Top Coat Time


To seal in my manicure, I use their Good To Go fast-drying top coat. Out of what I've tried, this is by far my favorite. It dries my nails and hardens them in a couple minutes after application. I do two coats to make sure that I've sealed every inch of my manicure in. Whenever I use this, my nails never smudge. It dries them very thoroughly so you don't need to worry about not touching anything. They also never chip. My manicures usually last between 1-2 weeks before I redo them, and that's only because I get annoyed with the part of the nail that has now grown out.


Products Used:


Sephora 4 Step Nail Buffer - 7$CAD

Sephora 4 Step Nail Buffer - 7$CAD

Sephora Mini Crystal Nail File - 10$CAD, and 12$CAD for fullsize

Tweezerman Hot Pink Nail Rescue Kit - 24$CAD

Essie Apricot Cuticle Oil - 10$CAD

Essie Millionails Treatment - 10$CAD

Essie Grow Stronger Base Coat - 10$CAD

Essie Mint Candy Apple - 10$CAD

Essie Muchi Muchi - 10$CAD


Essie Good To Go Top Coat - 10$CAD


My Nails:


Thanks for reading and I hope you enjoyed today's nail post! Usually I love wearing darker colors on my nails, like black, dark red, dark purples, anything dark really. I also have this random love for the color green. I gravitate to green makeup and nail polish. It's weird. I'm not one to wear pastels, like you wouldn't catch me dead in pastel colored clothes, but there's something cute about this nail color scheme. Mint Candy Apple is such a beautiful color, no wonder it's one of Essie's most popular shades. Her nail polishes go on super smooth and have a nice glossy finish. For my accent nail, I decided to stick with the pastels and do a light pink using Muchi Muchi. The colors complement each other very well. The only other time I've worn pastel nail polish (and I'm not counting when I was kid) was when I did my water marbling tutorial. I mean hello, most of my clothes are black, shades of white, browns, zebra and leopard print. Not typically a color girl, let alone pastel. But like I said, Mint Candy Apple just has something about it that I couldn't resist!!

So what do you think of Essie's Mint Candy Apple and Muchi Muchi nail polishes? What other shade(s) would you pair Mint Candy Apple with? What is your favorite Essie nail polish color? What do you think of her other products that I mentioned (treatment, top coat, etc)?

My next post is going to be my VERY FIRST DRUGSTORE HAUL!!!!

Steph xo.