Monday, December 23, 2013

Babyliss Miracurl Review and Tutorial

Hello dolls!!

So the semester is over, work is over, and Christmas break is here. I should be able to post a lot more during my break. I've just been going through a lot lately so I haven't really been in the mood to post. So here's a recap on everything makeup: I tried out the Naked 3 palette. It's pretty good. More on that in my review/tutorial post coming up this week. I never did try out that Sultra Curling Rod just yet, but I did get around to trying the Babyliss Miracurl, which I'll be talking about right now! I used it last night to curl my hair and wow. I never did get around to finishing the Perfect Palette Tag, but that's next on my list. I also bought a few products from Lush for the first time in my life. Unfortunately, I haven't been able to try out my bath bomb or bubble bar because my tub is pretty dirty. I'm going to wash it this week and then take a relaxing bath and I'll let you know all about it. I also got my mom a Christmas present there too, but I can't say what it is just yet in case she reads this. I'm still trying to figure out what to get my dad and brother. Any suggestions?


Finally, my Babyliss Miracurl has arrived!! Actually, it arrived last week after a looong looong wait (I bought it on Black Friday online but it was out of stock so I had to wait a while for them to receive it and then ship it out to me). I used this last week on my mom's hair when we first received it. Her hair wasn't freshly washed, and getting greasy, so it didn't curl well im some areas, namely, the back of her head, where it didn't curl at all. But it curled very nicely on the sides of her head. I had similar trouble with this, so I would recommend using this on freshly-washed hair ONLY. I was excited to try it out, so that same night I curled various sections of my dirty hair and got the same problems as my mother. My hair is very difficult to curl too. So unless your hair curls very easily, I really don't recommend using this on dirty hair.

My mom bought the Miracurl because she wanted to be able to curl her hair very easily and quickly, without the fuss of a regular curling iron or rod. I can say that it definitely does curl hair much quicker and it makes the job so much easier. It does give a different type of curl, in my opinion, but I still do enjoy it and I think it looks lovely.


I also want to note that I am not wearing any makeup. Not even 1%. So can we please not talk about the outbreak of pimples in my forehead/nose region?? And can we not talk about how bad I look?? God bless Photobooth for the above photo and not making me look like too much crap.

What's In The Box?


The box contains the Miracurl (obviously), a cleaning tool, and 3 booklets. The cleaning took is very tiny, and is meant to be put in the space between the roller and the side of the machine (on the side that faces your head). It is covered with felt, so that it gently cleans the roller without scratching or breaking it. The included booklets are the instruction manual, a quick-start guide, and a tips and techniques style lookbook.

Front
this is the side that faces your head
hair goes into the V shape, right on top of the roller

Back

Top

Bottom


How Does It Work?

Now, before I get into my in-depth review, I'm going to explain how this device works. When I first saw it, I thought it looked like some extra-terrestrial croquet mallet. But no, it's actually a device to easily and quickly curl hair. I'll first explain how the setting works, and then I'll explain how this actually curls your hair. So, the first setting, located on the left, is the curl direction setting. This decides which in direction your curls are going to turn. The 3 options are: R,L, and A. R is for right, so you choose this if you want curls going right, or if you are working on the right side of your head. L is for left, so you choose this for curls going left, or if you are working o the left side of your head. A is for alternating, so it alternates your curls left and right, so you have a more natural look. This is the setting that I chose for today's look. The next setting is the time setting. The 4 options are: 12, 10, 8, 0 seconds. You choose the time option for your hair type; I should have chosen 8 seconds for my fine hair, but I chose 10 seconds because my hair is difficult to curl (and even more difficult to keep that curl!). So if you have coarse, thick hair, you should choose 12 seconds. The last setting is the time setting, where again, you have 4 options. You have III, II, I, and on/off. The on/off switch is at the right-most setting. You turn on the device by selecting the level of heat that you want. The red light will blink until it is ready, where it will then be continuously lit. For my fine hair, I chose the "I" setting. The three different heat settings are: I is 375F, II is 410F, and III is 450F. So you choose which heat setting is appropriate for your hair. That's about it for the different functions, now I'll explain how this device magically curls your hair!

The Settings:
R,L,A (curl direction)
12,10,8,0 (time)
III, II, I, on/off (temperature)

So you've set your settings, it's all heated up and ready to go, but now what? How exactly does this device curl your hair? So first, you should section off your hair like you would normally do when you curl your hair. Take a strand of hair in one hand, and the device in the other. There are two different sides to the device. On the first side, you can see the roller in the middle, and it reads "this side up (toward head)". You need to make sure that this side is ALWAYS facing your head. The other side is closed and you do not see the roller. So take your strand of hair, and you want to place it into the "V", with the rest of the strand hanging out, and then clamp down. The "V" leads down into the roller. When you clamp down, the Miracurl sucks the hair in from the other side (the side where your ends are) and then it rolls it around the curler. It'll beep once when it's in, and then it will beep three consecutive times when it's ready to be released. Make sure you keep it clamped while it's curling your hair. And make sure you release it before you take your hair out, otherwise it will just straighten your hair. I also think there's a method to removing your hair from the device. I like to go as slow and gently as possible so that I don't damage the curl. So that's it! The Miracurl does all the work for you! The only thing you need to do is section off your hair, and feed strands into the Miracurl! As they say, hair goes in, curl comes out!

This side faces your head
Hair goes into the V, which gets sucked in to the roller

What if you put your hair in the wrong way or it gets tangled up inside? The device will beep quickly and stop when it senses something's wrong. Then you unclamp it and remove your hair. It doesn't pull or hurt.


Now I didn't think of including any pictures or video of me curling my hair at the time so I hope this explanation was good enough for you to get a mental picture of how the Babyliss Miracurl works.


My Review


I have to say that I quite enjoyed using the Miracurl. It made curling my hair fun, fast, and easy. It was soooo cool to watch my hair get sucked up by the Miracurl and then get a nice curl in 10 seconds! It was really easy to use. I didn't really have to read the instructions, it was pretty intuitive. I really liked that it had an alternating setting for the direction of the curl. It heated up quickly. It's also good that there is a "0" time option, so if you need a bit more time, you can leave it in for as long as you like. I used the settings that were optimal for my hair, but I found that in some areas it didn't curl well. I had a few strands that were partially straight and partially curly. I was using the Miracurl on day-old hair so that could be the culprit, so I won't blame the Miracurl just yet. My hair is difficult to curl, so that could also be the problem. But for the curls that I did get, it looked fantastic. I used the alternating curls setting, and it looks very natural. As a whole, it curled very well on the lowest heat setting and middle time setting. It took so much less time than my usual curling method, where I curl my hair using a straightener (flat iron). I'm going to give this a 10/10 for now, and I'll definitely have to figure out why those random few strands don't curl. I'm pretty sure it was because they might have been more greasy, because when I first used the Miracurl when I first got it on me and my mom's third day hair, the greasier strands just would not curl. I definitely think you should go pick one up if you're interested, and maybe even as a gift to mom to make her morning routine much easier and faster!


My Tutorial


I started off using second day hair, but for best results, I suggest using freshly-washed hair. I divided my hair into 3 sections to start with. For the first section, take a rat-tooth comb and go above your ear and around to your other ear. This will be the bottom part. Then divide the hair you have left into two parts, I divided mine in the middle. I curl the bottom first and then I take out small horizontal sections from the left section starting at the bottom and working my way up to the top. And then I do the same thing on the right side. I don't have much hair and my hair is very fine, so you may need more, smaller sections depending on your hair type. Each strand you put in the Miracurl might need to be bigger/smaller depending on your hair type and how curly you want it to be. I also hair sprayed each strand after I curled it using Big Sexy Hair's Spray and Play Hairspray. I love all their products, I may have to do a review on their line one day.


I explained above how to curl your hair, so I won't go over it again in fear of this being too repetitive. I will tell you the settings I used for my thin, fine hair. I did alternating curls to get a more natural look. I also curled my hair for 10 seconds because my hair is harder to curl. I used the lowest heat setting, I, because of my hair type. So I used: A, 10, I. Obviously, if you have thick coarse hair you would use A, 12, III, and if you have normal hair you'd use A, 10, II.


So I hope you enjoyed this review and tutorial in one! Again, I apologize for not having any pictures of me using the Miracurl. It is very easy to figure out how to use it, so I don't think any of you would have any trouble with it. This may be my new go-to hair curling device! I love using a straightener, but it takes sooo long to do, whereas with the Miracurl, it literally takes seconds. Have any of you tried the Babyliss Miracurl? Do you think it's worth it?

I've got a bunch of posts coming up, like the Perfect Palette Tag, Urban Decay's Naked 3 review and tutorial, my first Lush experience, etc. So don't miss out by subscribing!!

Steph xo.

Friday, December 13, 2013

Neutral Greige Manicure using Ciate

Hello dear readers!!

I am so so so excited. I just got my Babyliss Miracurl in the mail today!! I used it on my mom's hair and it's so easy and amazing. I'll be doing a tutorial and review too soon. Reminds me, I never did that tutorial/review on my Sultra Curling Wand. Oh well, I'll catch up on all my hair tools soon!

It's time for another nail post. I've been working at school this past and will be working during exam week. That means that my nails will probably be destroyed by the end of it since I'm always touching things with my hands. I'm either stacking books into boxes, or stacking boxes in the closet. So you can see how hard it is for me to keep my nails nice and manicured and not broken. That's also why I chose to go with a light color for this week's manicure. I really wanted to go dark but I knew that when it starts chipping it would be a million times more noticeable on a dark color than a light color. After bugging a male friend to help me eliminate my choices down to the one, I ended up with a very light greige color. It's hard to describe the color but I like to say it's coffee with a lot of milk. That's what it makes me think of, though Ciate calls this particular color Cookies n Cream. I don't really see Cookies n Cream unless you pureed it haha.

If you've read some of my other nail posts then you know all about my usual nail routine. I like to use Essie because I find that their quality is superb. I even like Essie's top coat more than Ciate's. I've never tried OPI so you should suggest some colors for me!

All the Ciate polishes I have come from that huge 24 Days of Christmas box from last year, unless they are the Caviar Manicure sets from way back (the black and white ones). I think that last year's set had a lot more diversity in its color range compared to this year's. I like a lot of the shades and I'm always coming back to it. For those that don't have the set, I know that The Bay sells Ciate but I'm not sure about this specific color.


Neutral Greige Manicure using Ciate


Nail Prep

To prep my nails I start by removing any nail polish that's still on. Then I moisturize my nails and hands using The Body Shop's Almond Hand and Nail Cream. After my nails have moisturized for a little while I remove the excess cream. I file my nails using a Crystal Nail File I got at Sephora. I also use Sephora's 4-in-1 Nail Buffer. Then I put Essie's Apricot Cuticle Oil on my cuticles and nails too. As they're soaking I use my double-ended cuticle pusher / fingernail dirt remover manicure tool from Tweezerman's Hot Pink Nail Rescue Set to get rid of the dirt under my finger nails. Once my cuticles are soft enough, I use the other side of the tool to push them down. Then I use the Cuticle Nipper from the same set to trim my cuticles. Then I wash off the excess oil.

Polish Time

I start by applying two coats of Essie's Millionails Nail Treatment. This stuff really helps your nails to grow stronger. My nails used to be so fragile and damaged, especially after removing nail polish, but after using this product I can see a huge difference! The next step is to apply a base coat, I use Essie's Grow Stronger Base Coat because I want my nails to .... well... grow stronger! Hah! Once that's dry, I applied two coats of Ciate's Cookies n Cream. Two coats was enough to make the color opaque, you don't need a third coat. The last step is to apply a fast drying top coat, I quite like Essie's Good To Go. I put two coats just to make sure I covered every part of my nail. Since using this top coat, my nails never smudge after I've done them and they don't start chipping til over a week after I did the manicure.


The Manicure


Products Used:

Sephora Collection Mini Crystal Nail File - 10$CAD

Sephora Collection 4-in-1 Nail Buffer - 7$CAD

Sephora Collection 4-in-1 Nail Buffer - 7$CAD

Tweezerman Hot Pink Nail Rescue Kit - 24$CAD

Essie Apricot Cuticle Oil - 9$CAD

Essie Millionails Treatment - 9$CAD

Essie Grow Stronger Base Coat - 9$CAD

Ciate Cookies N Cream


Essie Good To Go Top Coat - 9$CAD


Thanks for reading! I hope you enjoyed my nail post even though it was nothing fancy. I didn't even realize that the color matched my sweater until I got home haha. What do you think of the Cookies n Cream color? I thought it looked weird when I looked at it in the pot, but when I tried it on, it totally changed my mind. It's a beautiful light greige color and it's the type of color you can wear with anything. What do you think of Ciate's nail polish line? I love Essie, I find their stuff really works from me, whether it's a treatment, top coat, or color, which is why I'm always using it lately. Is there an Essie product that you love the most? And what about your favorite Essie shade ever? I think mine would have to be Mint Candy Apple.

How do you like my little sneak peak of the next makeup look I'm planning on doing? I tried out the Makeup Forever Aqua Shadow sticks and did a look based on it. I'm still not sure if I like it cuz the colors I used are so out of my element!

Steph xo.

Wednesday, December 11, 2013

My Black Friday Sephora Haul

Hello dolls!

I finally got my Sephora Black Friday shipment!! I just picked it up from the post office this past weekend and I was so excited to play with all my great finds!! I bought most of my Black Friday online from Sephora and I also picked up a few things from the store. Wow was it ever nuts online!! I made sure I was online at 12am and I spent a little while going over with my mom what exactly we were going to buy, so by the time I checked out at 1am, two items in my cart were out of stock! Oh no! Those items were Philosophy's Purity Cleanser and one of the two Makeup Forever Aqua Shadow sets. Fortunately, after refreshing a million times, the Makeup Forever was back in stock and went right back out of stock after I added that to my cart and checked out. I wasn't so lucky about the Purity cleanser, so I decided to get Philosophy's 500 Point Perk which contained a very tiny Purity Cleanser. I really really wanted that cleanser so I sent my mom out to Sephora that morning. And they had it there and I was happy once more! She also picked up a few other things that she thought I would like. They also gave her literally 10 samples. Go mom.

If you were shopping at Sephora on Black Friday like I was, you knew that they had a whole bunch of special items for 12$CAD or 10$US. You could only purchase a max of 2 items. On their site, they also had select items on sale, for example the Stila In The Moment Palette, which went down from 50$CAD to 26$CAD just for that weekend. They are now back up to 50$CAD on the site. I forget what else they had, nothing that I was really interested in. I don't think that this particular sale was advertised anywhere.

I'm going to show both hauls together, so here we go! And I know I bought a ton of crap, but how can you not when all this stuff is worth so much more than what they're selling it for and you know you're going to use it!

I lost a few of the boxes for some products.

I will be doing tutorials/reviews on these products soon.


My Black Friday Sephora Haul

Philosophy Purity Cleanser X2 (12$CAD, worth 34$CAD)


This is a 12 fl. oz. 3-in-1 cleanser, makeup remover, and toner. Philosophy is known for this cleanser. I've been using it a lot since I got it and I love it. It's soft and gentle on the skin, yet it removes every trace of makeup. I really really like it. For the price, you get an insane amount of product so I can understand why everyone went nuts and bought out this product within an hour of the online sale. If you haven't tried this out yet, I suggest you get a sample at Sephora and you'll fall in love.

Bare Minerals Enchanting Eyes (12$CAD, worth 25$CAD)


My mom picked this up for me at the store. It's a cute little compact with two eyeshadows and a sponge tip applicator and also comes with a mini Prime Time, their eye primer. The duo is called The Flashback and the shades are Deja Vu and Amnesia. Deja Vu is a light silver shimmer and Amnesiac is a dark matte grey. I haven't used it yet, but it looks like a great duo to have if you love smokey eyes like I do!

Too Faced Better Than Sex Mascara mini and Perfect Eyes Eyeliner in Perfect Black mini (12$CAD)


My mom picked this up at the store because she knows I love all things Too Faced. She didn't know that I already have a fullsize mascara as well as a mini, and I also have half of the eyeliner, as well as a backup in my drawer. I knew that she was looking for a good black eyeliner and she could also do with a good mascara too, so I told her to keep the set. She didn't want to, but I eventually forced it upon her. I didn't really need it and I knew she did. I love both products. The eyeliner is the darkest matte black you'll find and it goes on so smooth and doesn't come off all day. The only downside is that it does tend to rub off on my contact lenses quite a lot so I can't really use it much anymore unless I don't mind being blind and cleaning my contacts every 5 seconds. But for non-contact wearers, you'll love the eyeliner. The mascara was pretty good, but it isn't my favorite by Too Faced. I much prefer their Lashgasm mascara.

Boscia Pore Perfection Set X2 (12$CAD)


I ordered one set and my mom picked up another in store. It comes with a mini Luminizing Black Mask and 3 Pore Purifying Black Strips. I love their black mask and had always wanted to try their black strips so I had to get this set. Boscia's products are pretty pricy, so this is a very good deal. I'm already in love with the Black Mask. It helps to remove blackheads and impurities, as well as diminish pores. When I tried the Black Strips for the first time, oh my God. They are seriously the best pore cleansing product ever! It removed all my blackheads and made my skin smooth and clean! The only bad thing is that the Black Strips are so expensive! That'll definitely have to go onto my Christmas list. Again, this set was a great value and if you have problems with pores and pimples, you need to check out their entire Black line.

Makeup Forever Aqua Shadow Duo in 2E and 30E (12$CAD, worth 48$CAD)


This was the one that had sold out online while I was trying to check out, but had luckily come back in stock just for me!  I don't have many Makeup Forever products beside their HD Foundation and HD Powder, and I knew what a great value these Aqua Shadow sticks were, so I went for it. This set comes with 2E, which is a matte brown, and 30E which is a pearly pink beige. I wore them yesterday and did the look that was included on the card. I don't usually use shadow sticks so I needed a little guidance. I wasn't a total fan of the look but now I know how I can use these shadow sticks to make a look even better.

Makeup Forever Aqua Shadow Duo in 20E and 28E (12$CAD, worth 48$CAD)


This is the other set of Aqua Shadows that they had. 20E is a pearly taupe and 28E is a pearly beige. The colors are more similar, so I didn't think there's much of a contrast between them until I actually tried them. Again, I did the look on the card that came with the box. The shadow sticks give a soft shimmer to your eye and it's super easy and fast to do! You don't need to be a blending genius to use these shadow sticks and still look beautiful. The value for both these sets is insane, so I had to get both. I'll definitely be experimenting with them, as I don't own any shadow pencils except these now!

Stila Portrait of a Perfect Eye (12$CAD, now 19$CAD)


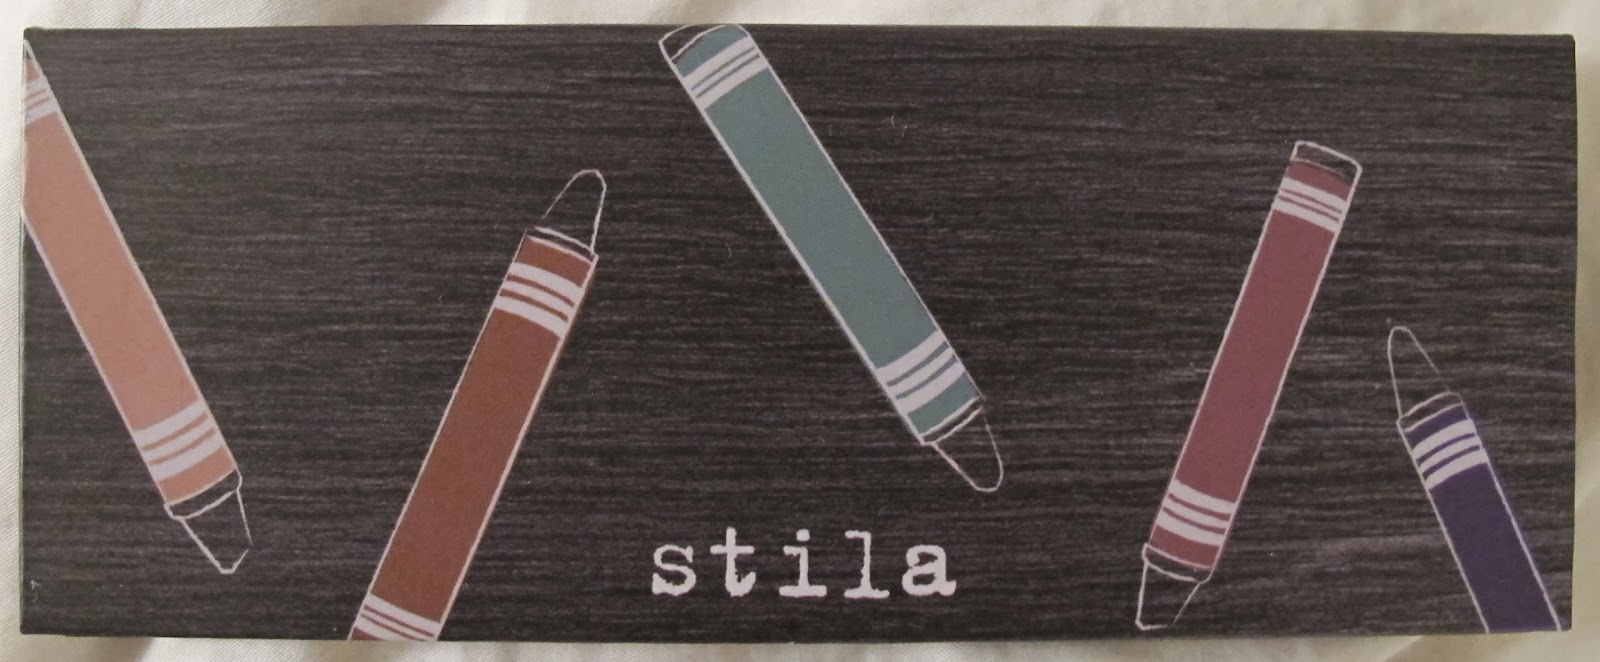
This Stila palette is part of their Christmas 2013 collection and it went down in price just for Black Friday. This palette contains six different brown/neutral shades: Parchment, Organza, Vintage, Linen, Antique, Rosewood. The first and last shades are matte, and the rest are shimmer. I received this today so I haven't played with it yet, but this is the type of palette you can use everyday for work or school because it's neutral.

Stila Artful Eye Collector's Edition Vol 2 (12$CAD)


This Stila palette and the one below were sold just for Black Friday. This palette is also a brown/neutral palette with 5 shades that are slightly bigger than the size of Portrait of a Perfect Eye. The shades are: Patchouli, Ember, Sandalwood, Rosewood, Eclipse. They are all shimmer except the last one, which is a matte black. You can use this for day looks or night looks. I liked this palette the most when I saw them all online.

Stila Artful Eye Collector's Edition Vol 3 (12$CAD)


This Stila palette was also just sold on Black Friday. This palette is colorful, it has a shade of green, purple, blue, golden-y brown and brown. They are all shimmer. The shades are: Light Apricot, Umber, Aqua-Marine, Soft Violet, Ocean. I think the idea with this palette is to use the goldeny brown and brown shades together and to use one of the three other shades to add a pop of colour to your eyes, especially if you're not used to wearing colors. I haven't tried this palette out either yet since I just got it.

Stila In The Moment Palette (26$CAD, now 50$CAD)


I had gotten samples of three of their palettes a little while back. I have just started trying them out and I love the colors that are in them. The two that were on sale for Black Friday were this one, and In The Garden. I didn't see myself using In The Garden much, but I did see myself using In The Moment because it had both purples and browns. The In The Moment palette contains 10 eyeshadows and one Smudgestick Waterproof Eyeliner in Tetra (purple). The shades are: Instinct, Impulse, Glance, Improvise, Catalyst, Desire, Wonder, Spontaneous, Whim, Captivate. They were selling both palette for half price, which is actually the same price as buying the smudgestick eyeliner alone! Ridiculous! I did a purple eye look a few days ago using this palette and I loved the colors and pigmentation. Since I was using a sample, it was a bit hard to get the color on the brush, but that isn't a problem for the actual palette. The palette also comes with a Lookbook with six looks.

Benefit Gimme Brow in Light/Medium (not a Black Friday deal, 26$CAD)


Now this one wasn't a Black Friday deal, I had suggested this product to my mom because her eyebrow hairs are very very light, so it can seem as if she barely has any eyebrows sometimes. We received it today and I applied it on her brows and what a difference it makes! If you have very fair light hair, this shade is perfect for you. It tints your eyebrows slightly so it looks as if your eyebrows actually exist. The shade is perfect, it doesn't look fake or too obvious or anything like that. It's a subtle difference that helps to shape your eyes and face. If you have very light eyebrows that are barely visible, I recommend this product. It really helps them to show through and it looks completely natural.

Philosophy Box of Miracles (500 Point Perk)


So I ordered this online when I found out that the Black Friday deal on Purity was sold out (my mom found it at our local Sephora later on). I love Philosophy's shower gels so I decided to go for it anyway and try out their skincare products. This a 500 Point Perk that is redeemable online. Some stores may carry it, mine did not. This set comes with a 2 fl. oz. bottle of Purity (really small compared to the huge one I just got!), Miracle Worker Miraculous Anti-Aging Moisturizer, and Miracle Worker Miraculous Anti-Aging Retinoid Eye Cream. I haven't tried the Miracle Worker products yet, but you all know how much I love Purity, which was the whole reason why I decided to get this perk in the first place.


So that's my Black Friday Haul!! Thanks for reading. I hope you were all able to partake in the savings too! It seems like I went a little nuts, but how can you not when you know you're saving so much money on all this stuff? Most of it was stuff that I wanted anyway.

So what great deals did you find?
Did anyone manage to get that amazing deal that Urban Decay had on their website? (I think it was 6 lipsticks for 50?)
And what did end up hauling from Sephora and other makeup stores?

Steph xo.

PS. I have a few posts coming up. I've got a 10 Minute Makeup post, a nail post, and I might do that Perfect Palette Tag.