Monday, October 14, 2013

French Manicure using Essie

Hello glamour girlies!

Sorry I haven't been posting much lately, been busy with school and other stuff and I'm feeling a little under the weather at the moment, but I'm going go ahead with this post anyway. I'm going to be walking you through how I do my manicures. I don't claim to be an expert by any means, I just like having nice nails, and by keeping them manicured they don't break as often, especially right at the quick. Ouch.

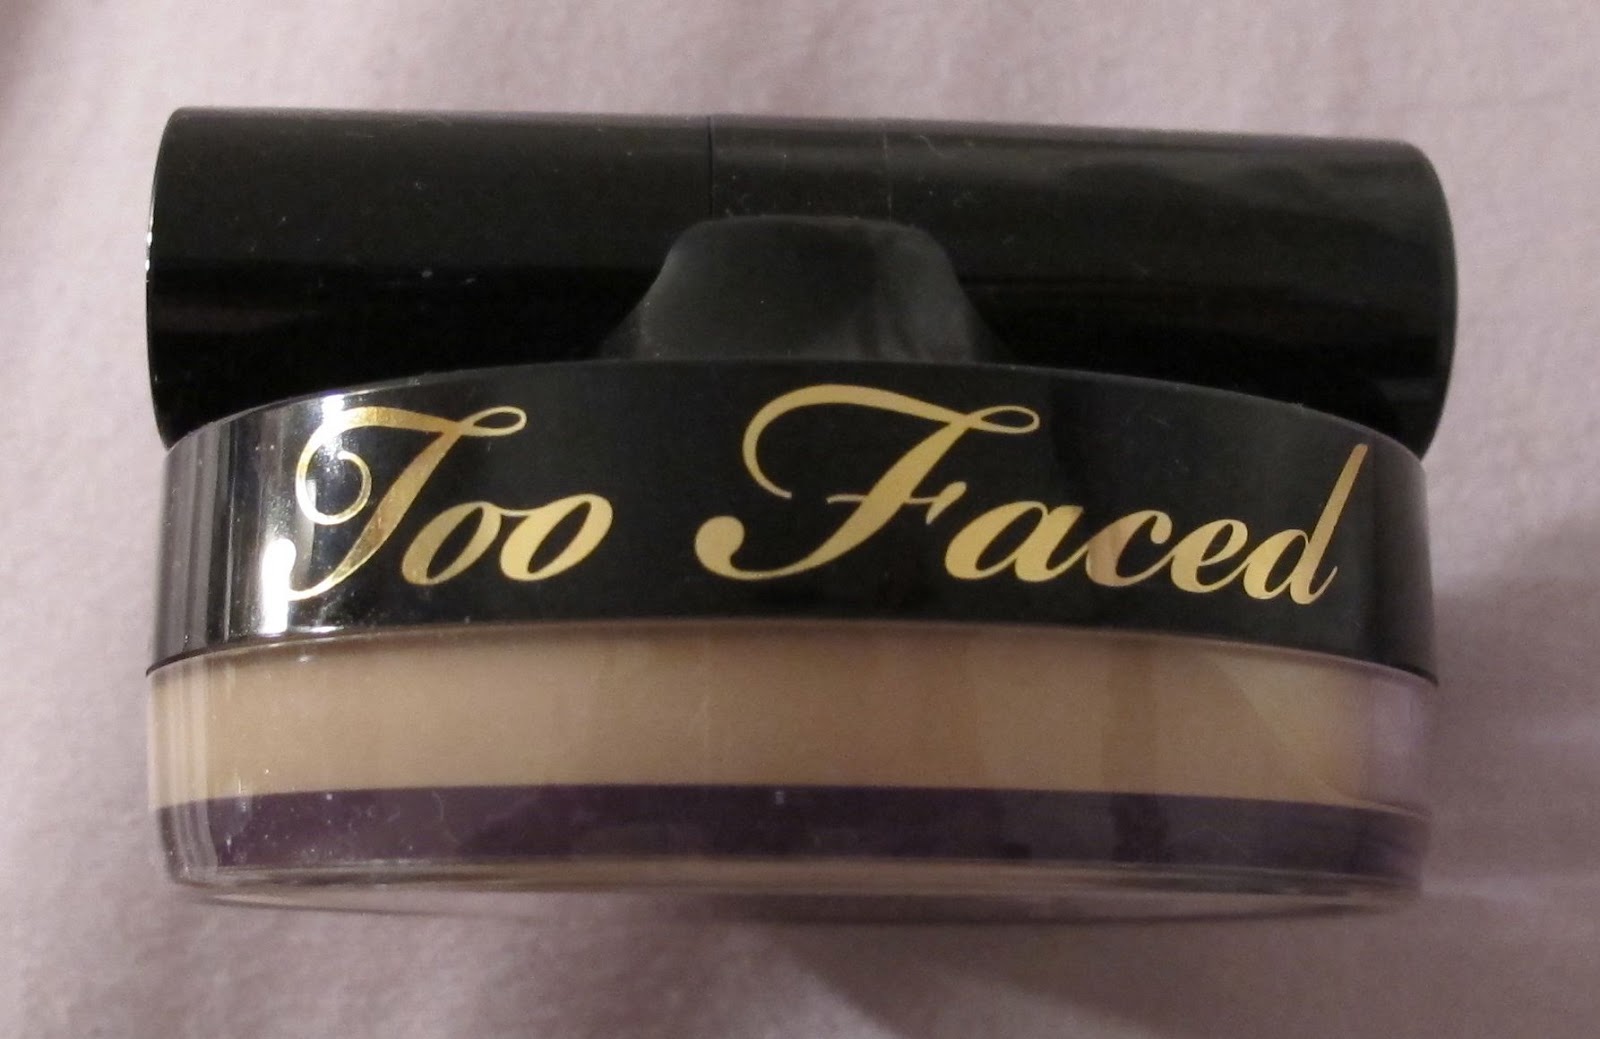
My mom also just bought me one of the new Too Faced Christmas 2013 sets!!!! I won't tell you which one, but I promise I will post a review and a makeup look soon!!!


Essie Nail Polishes

I've only just recently gotten into Essie polishes. And let me tell you, I've been missing out. Her polishes are amazing. They're such great quality and she has a lot of different colors in her collection. The one thing that I do think is lacking is more metallics, yellows and odd colors, neons, etc. But I do think she has a fantastic French Manicure collection out, more so than any other company I've seen.

I bought quite a few polishes to try out. In the French Manicure section, I bought Blanc and Marshmallow for the white tips. I've only tried Blanc so far and it's basically your standard white tip. I hear Marshmallow is supposed to be more see-through-ish than Blanc. Like you'd probably need two coats. For the pinks, I got Mademoiselle, which is basically the most popular color out of the whole collections, or so says the internet (it is in fact a very nice color, I tried this out first), Vanity Fairest, which is a lightly shimmered pink (which is the focus of today's manicure, the shimmer is ever so faint and it just adds a little something extra to the manicure), and lastly I got Ballet Slippers, which I haven't tried yet, but looks equally nice. I've been very impressed with the French Manicure nail polishes. So many different colors and finishes to choose from!!

For the normal color nail polishes, I bought Muchi Muchi, which is a light pink, it's a tad too thick to be a French Manicure color, but you will need more than one coat to get a nice coat of color, Mint Candy Apple, which is a light green color (and possibly my favorite), Turcs and Caicos, which is a metallic teal color, that I thought looked a hell of a lot better in the bottle than out, and Lilacism, which is a light purple. I've tried all of them except Lilacism. I tried Muchi Muchi and then on my ring fingers I put Green Candy Apple, and they looked amazing together. I got compliments all week on them. But unfortunately it got ruined before I was able to make a post (this was back when I was working everyday). But I promise that I will do a post on that someday.


How I Prep My Nails for a Manicure

I started out by filing my nails with my brand new mini crystal nail file, that I got from Sephora for about 10$CAD. I read a lot about crystal files being very good for your nails and that they last quite a while. So I thought I would at least give it a try, and I'm glad I did, because it made a huge difference on my nails. After filing I grab my Sephora 4-in-1 nail block and I continue on from 2-4, polishing my nails, etc. After that's done, I apply some of Essie's Apricot Cuticle Oil to my cuticles (I like to apply it to my nails as well) and I take my Tweezerman Cuticle Pusher and I gently push down on the cuticles. Then I take my Tweezerman Cuticle Trimmer and I trim off whatever excess cuticle I have. I don't go crazy on trimming them, I only really trim off the excess. I don't trim the whole darn thing off. Then I wash off the oil. Now it's polish time!


Nail Polish Time

I start out by using Essie's Millionails Treatment. I apply two coats of it onto my nails to prepare them for the polish. My nails get very brittle from all the nail polish and remover. I only do my nails every 2-3 weeks and they are still extremely brittle and they hurt and my nails break. But since I've been using Millionails, my nails have changed and become stronger in between manis. It really helps your nails and I recommend it if you're having the same problem as me. If not, you can skip that step. They also have products for your nails to grow faster, etc. Next, I use Essie's Grow Stronger basecoat. I apply one coat of that. I forgot to mention that in between each coat, I use my lamp as a nail heater by placing my hand as close to the lightbulb as I can without touching it. This accelerates the drying process. Now it's time for the fun stuff! Take Essie's Blanc, this is what we're using to paint the white lines. To get that nice, smooth, perfect line; make sure you apply it using one stroke. By using one smooth stroke you get a perfect line. After this dries, use Essie's Vanity Fairest for the pink. Vanity Fairest is a shimmery light pink, but the shimmer isn't that strong or visible. If you look at it in the light, you can see the shimmer, but it isn't obvious. Apply two coats of it to the entire nail. After this dries, I like to apply two coats of Essie Good To Go fast-drying top coat. This ensures that the polish is sealed and hardened and dry. So by now you should have a wonderful looking French Manicure using Essie polishes.

I also want to state that the pictures of my manicure have been taken at least 5-6 days after I did them. I haven't gotten a single chip since doing them. Sorry about the delay.


The Manicure Itself


Products Used
Sephora 4 Step Nail Buffer - 7$CAD
File and Buff sides

Sephora 4 Step Nail Buffer - 7$CAD
Polish and Shine sides

Sephora Mini Crystal Nail File - 10$CAD, fullsize is 12$CAD

Tweezerman Hot Pink Nail Rescue Kit - 24$CAD
includes: mini nail file, cuticle pushes/nail cleaner, cuticle nipper

Essie Apricot Cuticle Oil - 9$CAD

Essie Millionails Treatment - 9$CAD

Essie Grow Stronger Base Coat - 9$CAD

Essie Good To Go Fast-Drying Top Coat - 9$CAD

Essie Blanc Nail Polish - 9$CAD

Essie Vanity Fairest Nail Polish - 9$CAD


Thanks for reading and I hope this post was interesting for you! It's a little spin on the classic french manicure by using a slightly shimmery pink nail polish. I promise that the next nail tutorial won't be a french manicure haha. And yes, I am aware that my nails are growing out. Good thing I took the pics when I did, the day after I chipped a nail. I honestly don't do my nails until they start chipping really bad or I get tired of the color. What nail polishes and brands do you use for your ideal french manicure? And what is your nail care routine? I gotta say, I highly recommend getting the crystal nail file and the Tweezerman nail set. For polishes, I highly recommend Essie. This is the first brand that I've used that hasn't chipped in the first few days (since I've been using fast-drying top coats anyway). Also, the treatment and base coat are helping my nails to be stronger, which is great, because I hated how they felt so brittle after I'd take my polish off.

So again, let me know what your favorite Essie polishes are! And check back, because I'll be posting a Christmas Collection post talking about all the awesome Christmas collections coming out this holiday season. I'll also be doing a review and a makeup look using my new Too Faced Christmas Collection Palette (not sayin which one just yet!)

Steph xo.


Saturday, October 12, 2013

Empties & Extras #3

Hello glamour girlies!!

It's time for another edition of Extras & Empties. I have to say that I haven't really been collecting any Extras lately. I usually end up having a bunch when I buy sets, but I've been buying more individual items lately. There's no particular reason behind that. I'll be linking my very first Empties & Extras post where I go through ALL of the makeup and skincare extras that are hiding in my drawer. It hasn't changed much.

For empties, I've got a lot hiding in my drawer and I want to get rid of them and get some space back haha. Most of them are skincare items again, but I do have a few makeup and even fragrance items. You'll have to read on to see what I've used up and if I recommend it or not. Let me know if you want me to only show my makeup empties, as I feel that the skincare ones are getting a little repetitive because, let's face it, I've been using the same stuff for ages. Comment below what you think.

Also, let me know if you like these kinds of posts. I always thought they were interesting, seeing what people used the most and seeing the extras they've been stockpiling.


Now time for today's topic!


Extras & Empties #3

The Empties

Body Shop

Seaweed Pore Perfector X 2


A few months ago I tweaked my skincare routine. I took out some Tea Tree products I thought weren't working or could react with my skin better, and opted for the Seaweed line, which I heard could be used in conjunction with the Tea Tree line. I'm not sure if these pore minimizing products actually work. I'm going to have to say that I'm not really sure on this one. I can't tell if it's a combination of all my skincare products helping my skin not if this particular product is helping and how much. Will I buy it again? I have a few stored up, but I don't think I will buy anymore when they are done. I'm trying to find a skincare routine that is better than the one I currently have.


Tea Tree Blemish Fade Night Lotion X 2


This is one product that I'm absolutely sure helps my skin. I've been using it since I was a teenager. You can see the difference the next morning. It helps for scaring, redness, acne, pimples, you name it. It clears my entire face. This is one product I'll always recommend because it's fantastic. This will help your skin so so much. I'll always continue to buy these.


Tee Tree Skin Clearing Toner


The toner is pretty good I'd say. Obviously I haven't noticed anything obvious, but it does help to cleanse the last bits of makeup off my face that I've somehow missed. A girl always needs a good toner to help restore her face's pH balance back to normal. I'd recommend this product. Currently, I'm trying out a couple different toners just to see, though I have quite a few of these in my drawer. Hoarder much.


Tea Tree Face Mask


I've been using this mask for a little while now and it's been pretty helpful in clearing up my skin. It's a green mask that you wash off after 15 mins. It cools your face as well and I always notice that my skin looks a lot clearer the next day after using this. I would definitely recommend this mask to a friend. You know I hoard my skincare, but I have been trying out Boscia's skincare stuff lately so more on that later.


Seaweed Mattifying Moisture Lotion SPF 15


I recently switched from the Tea Tree Lotion to the Seaweed Lotion because the tea tree one was making my cheeks just a little bit too dry. I switched to this and it's pretty good. My cheeks aren't as dry anymore so it seems to be hydrating my skin pretty well. The only thing I don't like is how it goes on white. It mooshes with the rest of my skincare products and looks all weird and uneven after that whole mess of products. I would recommend this product to a friend.

Coconut Body Scrub X 2


I love the Body Shop's coconut scrub. I can feel it getting all the dirt off my skin, so the dirt doesn't flake off my skin after the shower anymore. I can get really clean! Not to mention the smell of this scrub is amazing and it leaves me smelling great. I deeply recommend this product for a good ol' deep cleaning of your skin.


Sephora

Alterna Caviar Anti-Aging Perfect Iron Spray


I recently tried Alterna's Heat Protecting Spray. This is the first heat protectant I've ever used. It seems pretty good, but that can be partly due to the amazing hair straightener I bought, T3 Singlepass, which is also supposed to be nice on the hair. It keeps it from frizzing out or anything weird like that while I'm straightening it. After straightening, my hair is all sleek and soft and just beautiful. Whether it's this or the straightener, something somewhere is working. I recommend this product and I also recommend people to use a heat protectant before styling their hair, as it protects it from damage due to heat.


Makeup Forever HD Powder


This is the best setting powder I've ever used. They make an awesome powder and it goes especially great with their HD Kabuki brush. It does an excellent job of setting your makeup and preparing it for blush/bronzer time. It helps to create a flawless face. I use this everyday (unless I'm testing or switching it up) because I love it. I would def def def recommend this powder!


Urban Decay All Nighter Makeup Setting Spray


I always thought that setting sprays were a sham for some odd reason. No clue why, just always thought it was weird. One day at Sephora I saw they were selling these minis (yeah the old ones!) for 12$ so I figured why not. I wanted to give it a try after reading about the different setting sprays by different brands. This one seemed to be a good one. And wow am I ever happy I bought it. Setting sprays actually do work and they help your makeup to last longer. I find that I don't smudge my cheeks by the end of the day (I always rest my hand on my chin/one side of my face) when using this. I'm pretty darn impressed and I always remind myself to use this if I'm having a long day. I would totally recommend this to you, and especially to someone that has long 10 hour days who still wants to look fabulous at the end of the day.


Chanel Coco Mademoiselle Eau de Parfum


Ahh I finally finished a perfume bottle. Finally. This is my very first empty perfume bottle!!!! I've reached a milestone!!! OMG CELEBRATE!!!! I traded in my high school signature scent  for Chanel's Coco Mademoiselle in my early 20's. Even in my high school days, I loved this perfume. But honestly who would buy their teenage kid such an expensive thing as Chanel? Back then I always thought that Chanel was like, unbelievably expensive. Like a thousand times more expensive that Givenchy. Hah (In case you were wondering, my first signature scent, my high school one, was Givenchy's Hot Couture). I always loved the smell of Coco Mademoiselle, so I finally got it as a gift from my dad, who was on a business trip and passed by the Duty Free Shop. The Eau de Parfum has a very different smell than the Eau de Toilette so do be careful when buying and smell them both. Personally, I do not like the smell of the Eau de Toilette. I really really do not like it. The Eau de Parfum, on the other hand, smells soooo wonderful. I would definitely recommend this perfume to a friend, it's a classic!!


The Extras

As I said, all my extras are honestly all the same stuff I posted in my very first Empties & Extras post. I honestly haven't been hoarding anymore stuff, I only have like 2 new things, which isn't much to show off, since they're both minies anyway. Take a look at my first post for all the stuff I'm hoarding. 

Empties & Extras #1


Thanks for reading and again, I hope you enjoyed today's post and looking into my garbage! haha. I hope it was cool to take a look at my used up products. There's certainly a pattern, as I keep using the same products over and over again. What are your holy grail products that you use up time after time again? Let me know what they are!

In the very near future I will show you my new Too Faced Christmas 2013 item!! Gahhh so stoked about getting it. I also prepared that French Manicure post, finally! I was going to do it tonight but I got class in the morning and it's seriously getting late, so maybe double post tomorrow.

Steph xo.


Thursday, October 3, 2013

Back to School Makeup Looks

Hello glam girls!!

And especially younger readers because today's post is specifically for you. I initially planned on doing this post quite a while ago, back when school just started. Forgive me for posting this so late, but I think it's always worth it to learn about how you can be planning your "professional" makeup look a little better, don't you think? It's never too late to re-assess your daily makeup routine and improve it.


I can tell you right now that at my old high school, we had a very strict no makeup policy. We were able to get away with wearing a bit of concealer and mascara here and there but if you were caught, you had to go to the washroom and take it off. If it was waterproof, you ended up scrubbing your skin off. I think that having a no makeup rule is a good thing, it's honestly one less thing to worry about. I mean, would you really want to be concerned with how you were going to wear your makeup that day and which brands you would use so that you could impress all the popular girls? Yeah, didn't think so. And it's also better for your skin that it gets to breathe. But if you do want to wear a little bit of makeup, stick around for a light makeup look. Remember, less is more.

But what if your school allows makeup (meaning you're in college)? Then how should you wear it? School isn't a place to show off how you're planning on doing your makeup at that party coming up this Saturday night. So no club makeup, no smokey eyes, nothing too dramatic. You really want to keep it simple. So you can enhance your features with a bit of help from our friend, makeup. You want the makeup to look effortless. You want to make people think that you woke up like that, looking all beautiful.

Stick around to see a very natural makeup look towards the bottom.


Makeup Policy Makeup

I can say that we've all cheated back in high school when we weren't allowed to wear makeup. The trick to this look is to wear the least amount of makeup possible, because if they realize you are wearing an ounce of makeup, they make you take the whole thing off. So the trick is to keep it very low key and to not get caught. I'm going to give you suggestions and the point isn't to wear everything that I've suggested. Pick and choose between what you would like to wear the most and eliminate things that you don't normally wear. This look is most appropriate for very young teenagers in high school. I want to stress that this list is by no means the minimum amount of makeup you should wear, in fact, it is the opposite. Remember that less is more.

Eyes:
Nude or Highlighting Eyeshadow (MAC Shroom or Stila Kitten)
Mascara (Benefit Bad Gal Lash or Too Faced Lashgasm)
Brow Pencil (Benefit Instant Brow Pencil)

As a teenager, the most I did was put MAC Shroom on my eyelid. If you want to even out the color of your eyelids, you can use a very light neutral color (MAC Cork). If you want to look more awake, I would suggest more of a highlighting color (like Shroom or Stila Kitten). And if you want, you can also apply a light coat of mascara. Also, if you are so inclined, you can also fill in your brows real quick using a pencil. For high school level, this isn't really necessary unless you don't actually have any eyebrows.

Face:
Concealer (MAC Select Cover-Up Concealer for under eye circles, Studio Finish for blemishes and acne)
Tinted Moisturizer or BB Cream (Too Faced BB Cream)
Loose Powder (MUFE HD Powder)
Blush (Benefit Bella Bamba)

Honestly, a teenager does not need to wear loads of foundation and concealer on their face. You've got perfect baby skin. If you have dark under eye circles, I suggest wearing a concealer. I didn't wear foundation or bb cream (BB cream didn't even exist back then) but if you really want to wear something on your face I would suggest a tinted moisturizer or BB cream. If you have any acne or pimples or redness, use a cream concealer. If you are going the makeup route, I would suggest the tiniest touch of blush to add color back to your cheeks. I never wore blush in high school. Honestly, you really don't need to wear much makeup. Less is more. That is key. Oh and don't forget to set your makeup with a good powder!

Lips:
Lip Balm (EOS)

All you need for your lips is lip balm. For the fashionista in you, wear a light pink lipgloss. My favorite as a teenager was MAC Cultured and MAC Oyster Girl. Nowadays, the "cool" lip balm is that EOS one that looks like an egg.


No Makeup Policy Makeup

After high school you would probably think "yeah finally I can wear makeup!"  but honestly, that statement is a little overrated. Sure, you can finally choose what to wear each day, but each morning you find yourself thinking "what the hell should I wear today?"everyday  and "but I just wore that shirt yesterday". At least with a uniform you never had to panic over what you were going to wear that day. Same goes for makeup. I'm the kind of person that likes to switch it up everyday. I don't wear a set makeup look to school and work. I'm always trying out different products, especially for this blog now. So here I'll try to give you an example of something that I would wear everyday for school and work. The makeup look I'm describing in this section is for the older teen, the off to college teen. I've been really liking this look a lot lately.

I have done a similar look, the eyes are the same but the rest is diff. If you want to see this look, it's 10 Minute Makeup - Light, Work Appropriate, and Fast for the Gal on the Go. This is a great example of another makeup look that is perfect for the college girl.


Eyes:
Eyeshadow Primer (Too Faced Shadow Insurance)
Shimmery Beige Highlight Shade (MAC Shroom)
Medium Matte Brown Shade (MAC Charcoal Brown)
Shimmery Light Pink Highlight Shade (MAC Naked Lunch)
Gel Liner (MAC Fluidline in Blacktrack)
Pencil Liner (MAC Powerpoint Eye Pencil in Engraved)
Mascara (Too Faced Better Than Sex)
Brow Pencil (Benefit Instant Brow Pencil)

Prime your eyes, this will give you a good base to start on. Then apply MAC Shroom to your lid, MAC Charcoal Brown to your crease and then MAC Naked Lunch as a highlight under the brow bone. Then take a black gel liner and line your top lash line in a cat eye fashion (wing out the ends). Then take a pencil liner and tightline your top and bottom lash lines. Fill in your brows if necessary. I've posted this look before. I like it a lot.


Face:
Face Primer (Too Faced Primed and Poreless)
Concealer (MAC Select Cover-Up and MAC Studio Finish)
Foundation (MUFE HD Foundation)
Loose Powder (MUFE HD Powder)
Blush (Benefit Bella Bamba, Too Faced Secret to No Makeup Makeup)
Bronzer (Too Faced Bronzed and Poreless, Too Faced Secret to No Makeup Makeup)

This is the standard face routine that I go through currently. I usually add a highlighter/luminizer, but we don't need that for today's purposes. You can even skip on the face primer, but it does a lot of good honestly. Concealer and foundation are important (MAC and MUFE, respectively). If you have great skin, opt for bb cream instead. Also, get yourself an all-in-one face palette, it makes life so much easier, and your makeup bag so much lighter. I like to contour with my bronzer, but you honestly don't even need a bronzer, or just dust it lightly all over your face. A good blush will brighten up your face and give it some dimension. For a long time, Benefit's Bella Bamba was my go-to blush. Nowadays, I switch around often.

Lips:
Lipstick (Too Faced La Creme in Marshmallow Bunny, Chanel Rouge Coco Shine in Candeur)
Lipgloss (NARS Sweet Dreams, Turkish Delight, Too Faced Barely Legal)
Lip Balm (EOS)
Any nude or light pink lipstick or lipgloss is key for me. I like to keep it very natural looking. My favorite is Chanel's Rouge Coco Shine lipstick in Candeur. I love it, it's so moisturizing! It feels like a lipgloss. Something a little cheaper would be NARS Turkish Delight and Sweet Dreams lipglosses, Too Faced Glamour Gloss in Barely Legal, etc. Can't go wrong with a good lip balm like EOS or Fresh either.


My Low-Key Makeup Look

This makeup look is an in-between of the two looks I talked about. It takes things from both looks for a sort of mash-up. So don't take it for a definitive what to wear to high school look because it's not. I also used my fingers to save time. I'm not kidding when I say less is more. You're young and beautiful and don't need makeup. I had low self-esteem throughout high school. You don't need to hide behind a mask, you're beautiful. If others don't see that, then it's their loss, NOT yours. So with that said, here's my intermediate look:


Eyes:
Benefit Stay Don't Stray Eye Primer
Stila Eyeshadow in Kitten
Stila Smudgestick Waterproof Eyeliner in Angelfish (LE)
Benefit Bad Gal Lash Mascara
Benefit Eye Bright
Benefit High Brow
Benefit Brow Zings in Light

Prime your eyelids with Benefit Stay Don't Stray. Apply Stila Kitten to your lid using your finger or a brush.  Blend it out slightly past the crease, but concentrate most of the color on the lid. Apply Stila Smudgestick in Angelfish to the top and bottom lids. To make your eyes look brighter put Benefit Eye Bright in the corners of your eyes and blend it out with your finger. I sometimes like to apply it to my waterline to make my eyes look more awake. Then apply one coat of Benefit Bad Gal Lash mascara. To highlight the brow, apply Benefit High Brow directly under your brows. Now fill them in using Benefit Brow Zings. Voila! Your eyes are now more beautiful!


Face:
MAC Select Cover-Up Concealer in NW20
Too Faced Air-Buffed BB Creme in Snow Glow
Too Faced Primed and Poreless Loose Powder
Too Faced Candlelight
Too Faced The Secret to No Makeup Makeup Palette

  • Luminizer
  • Power Blush
  • Bronzer

Urban Decay All Nighter Makeup Setting Spray

I didn't apply a face primer, but do as you like. Cover up those undereye circles using MAC Select Cover-Up Concealer and your finger. Then apply Too Faced Air-Buffed BB Creme all over your face. I prefer to use my fingers because the body heat warms up the products and makes it more pleasant to deal with. Everytime I use this BB cream I realize how much I don't like it but I'm trying to use it more because I hate having products sit there not being used when I paid good money for them. I much prefer their first Tinted BB Cream, which was liquid. If you're using the cream one, definitely make sure you set it with a good powder, like Too Faced Primed and Poreless Loose Powder. Next take your trusty Too Faced Secret to No Makeup Makeup Palette out. Contour your cheeks using the Bronzer and get the perimeter of your face, temples, etc, as well. Apply the Powder Blush to the apples of your cheeks and blend outward and into the bronzer. Then take the Luminizer and apply it to the tops of your cheekbones, the top arch of your brows, the cupid's bow. Then go over all those places with Too Faced Candlelight for added glow. Also get the chin, down the nose, and the forehead. Remember to spray your face with Urban Decay All Nighter Makeup Setting Spray if you want your look to last from the morning til the evening. Your face should now look spectacular.


Lips:
NARS Lipgloss in Sweet Dreams

Lastly, apply a nude or light pink lipstick, like NARS in Sweet Dreams. The makeup look is complete and you should be looking great for your first day (or 50th day) of school!


Products Used


Stila Eyeshadow in Kitten - 23$CAD

Stila Smudgestick Waterproof Eyeliner in Angelfish (LE) - 26$CAD


Benefit Bad Gal Lash Mascara - 12$CAD for the mini. 26$CAD for the fullsize

Benefit Eye Bright - 25$CAD

Benefit High Brow - 26$CAD

Benefit Brow Zings in Light

Benefit Brow Zings in Light - 36$CAD

Too Faced Air-Buffed BB Creme in Snow Glow - 48$CAD

Too Faced Candlelight

Too Faced Candlelight - 38$CAD

Too Faced The Secret to No Makeup Makeup Palette

Too Faced The Secret to No Makeup Makeup Palette - 48$CAD

Urban Decay All Nighter Makeup Setting Spray - 15$CAD for the new mini (2X the size of the pic) and 35$CAD for the fullsize
NARS Lipgloss in Sweet Dreams - 29$CAD


Swatches from left to right:
Stila Eyeshadow in Kitten
Stila Smudgestick Waterproof Eyeliner in Angelfish
Benefit Eye Bright
Benefit High Brow
Too Faced Air-Buffed BB Creme in Snow Glow
Too Faced Candlelight
NARS Lipgloss in Sweet Dreams

Swatches from left to right:
Too Faced The Secret to No Makeup Makeup Palette
Concealer
Luminizer
Brightener
Cream Blush
Powder Blush
Bronzer


Thanks for reading today's  post and I hope it wasn't too long! I had really been meaning to do a Back to School Look for quite some time now! I hope that this post was informative and helpful and that hopefully you took something away from this. I really want to stress that for younger teens, less is more. You really don't need a full face of foundation. For college-bound girls, obviously makeup is more acceptable but you have to limit the amount you wear. It's not time to test-drive Friday night's look.


So what did you think of my Back to School look for all the youngsters out there? If it wasn't for the fact that I wore this look out today, I would have tried to do an actual look for a young high school girl. But I'm not running around with absolutely no makeup  :P  I really tried to keep it simple as much as possible. Obviously, you don't need to go and illuminate your eyes like crazy like I did. But you catch my drift. Stila Kitten is such a beautiful eyeshadow color, no wonder they're famous for it. I really like the Kitten eyeliner (actually called Angelfish), it pairs very well with the shadow. I didn't want to do a harsh black liner, so this was perfect to keep it natural. If I'm doing very natural eyes like this, I like to take the face a step further and start highlighting and luminizing. I think it just gives a great glowy appearance and makes you look more alive. Benefit has some great pencils that do just that. One thing I didn't like is Too Faced's new Air-Buffed BB Creme. Everytime I use it I remember why I stopped using it. The consistency of the cream sucks. It never ever sets and it just doesn't lie on the skin nicely. Also, I've noticed that it's been causing breakouts whenever I use it. I'm sad to say that this is my first product from Too Faced that I'm truly disappointed in. I wish I could say I love it, but it's far from it. I hope that you girls are able to get better results from it than me. What I did love from Too Faced is their Secret to No Makeup Makeup palette. That palette comes in handy, especially in your purse! It really has everything you need, especially for a younger girl cuz you don't even need foundation! I've spoken loads already about the other products, you should know I love them.

What did you think of the look itself? Would you wear this to school? And what products do you wear on a school day? Show me your lists and pictures! I'm curious to see your looks!

That 10 Minute Makeup post is here if you want to check it out.

Steph xo.